Blog

  • Dog-Friendly Thanksgiving: 10 Tips for a Safe, Calm Holiday With Your Dog

    Dog-Friendly Thanksgiving: 10 Tips for a Safe, Calm Holiday With Your Dog

    This post is general information, not veterinary advice. Ask your vet about your own dog’s diet and needs, and call your vet or an animal poison control line right away if you think your dog ate something harmful. The ASPCA Animal Poison Control Center is (888) 426-4435 (a consultation fee may apply). This post contains affiliate links. As an Amazon Associate, I earn from qualifying purchases, at no extra cost to you.

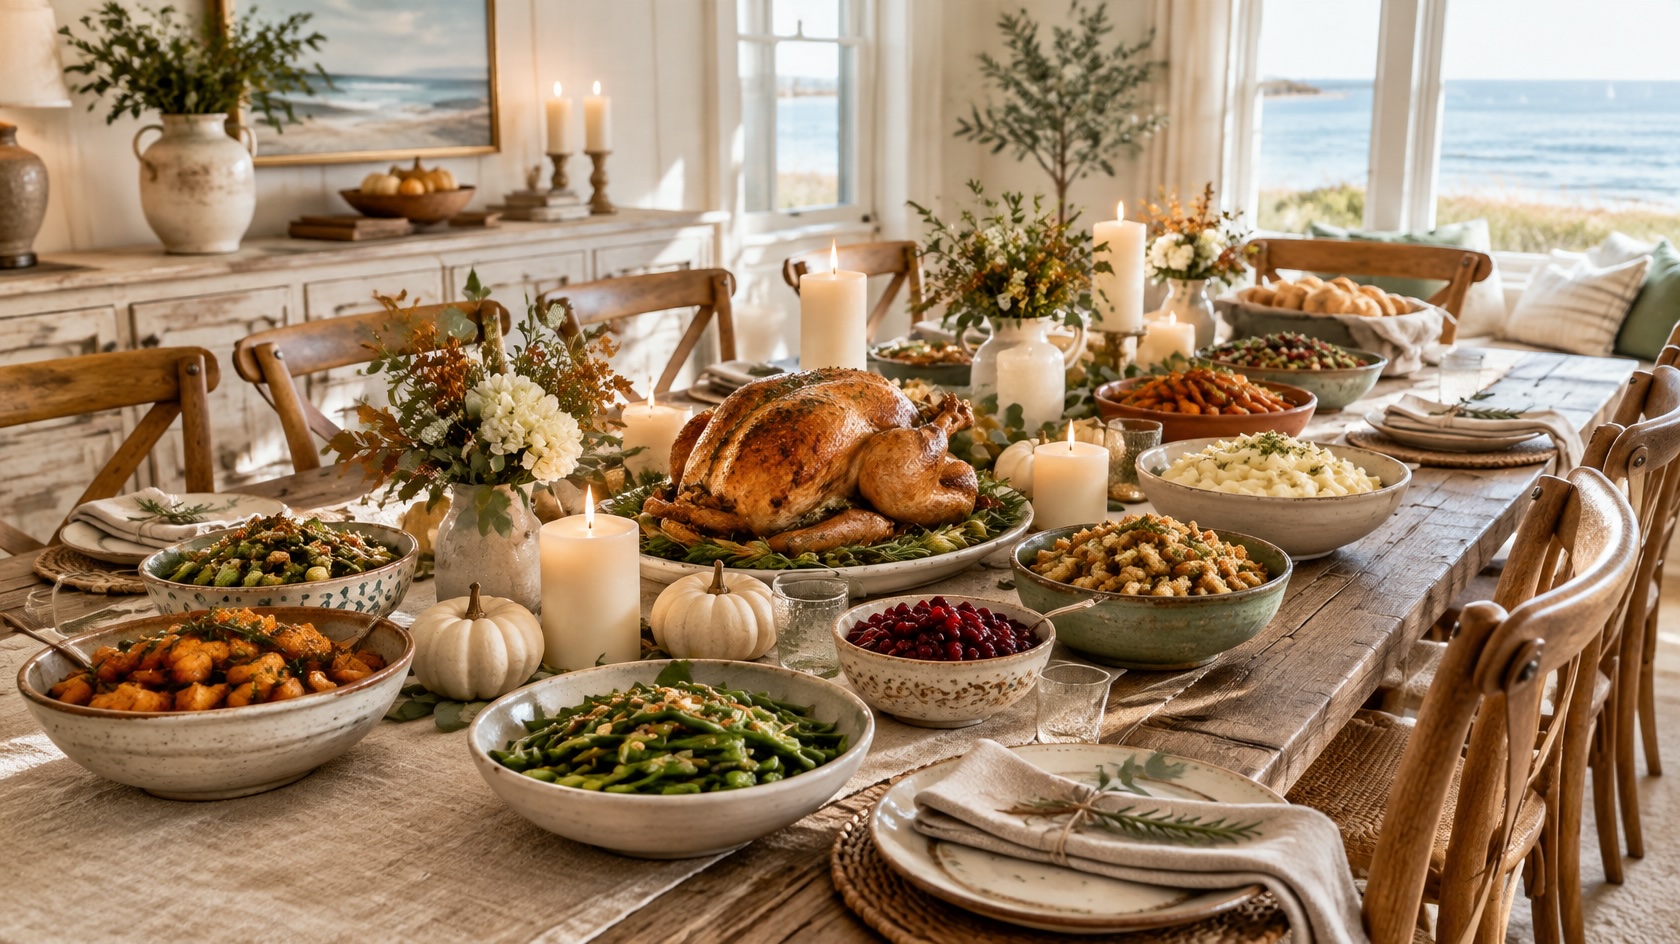
    Thanksgiving is all about good food, full tables and the people (and pups) we love. But between the turkey on the counter, guests coming through the door and a house full of tempting smells, the holiday can be a lot for a dog. With a little planning, you can keep your dog safe, calm and part of the fun. Here are 10 simple tips for a dog-friendly Thanksgiving.

    Keep the Feast Off Your Dog’s Plate

    Know the risky foods. Cooked bones, onions, garlic, grapes and raisins, chocolate and anything sweetened with xylitol are well-known hazards for dogs. Rich, fatty foods like turkey skin, gravy and pan drippings can cause stomach trouble too.

    Secure the trash. A turkey carcass, kitchen string and foil smell irresistible. Use a trash can with a locking lid and take bags straight outside after dinner.

    Ask guests not to share. Well-meaning relatives love to slip treats under the table. A friendly heads-up before dinner, or a cute little sign on the table, keeps everyone on the same page.

    Plan a safe holiday treat. Give your dog something special of their own, like their usual food in a puzzle feeder or lick mat. If you’d like to share a bite from the table, ask your vet ahead of time what’s safe for your dog.

    Plan for a Calm Day

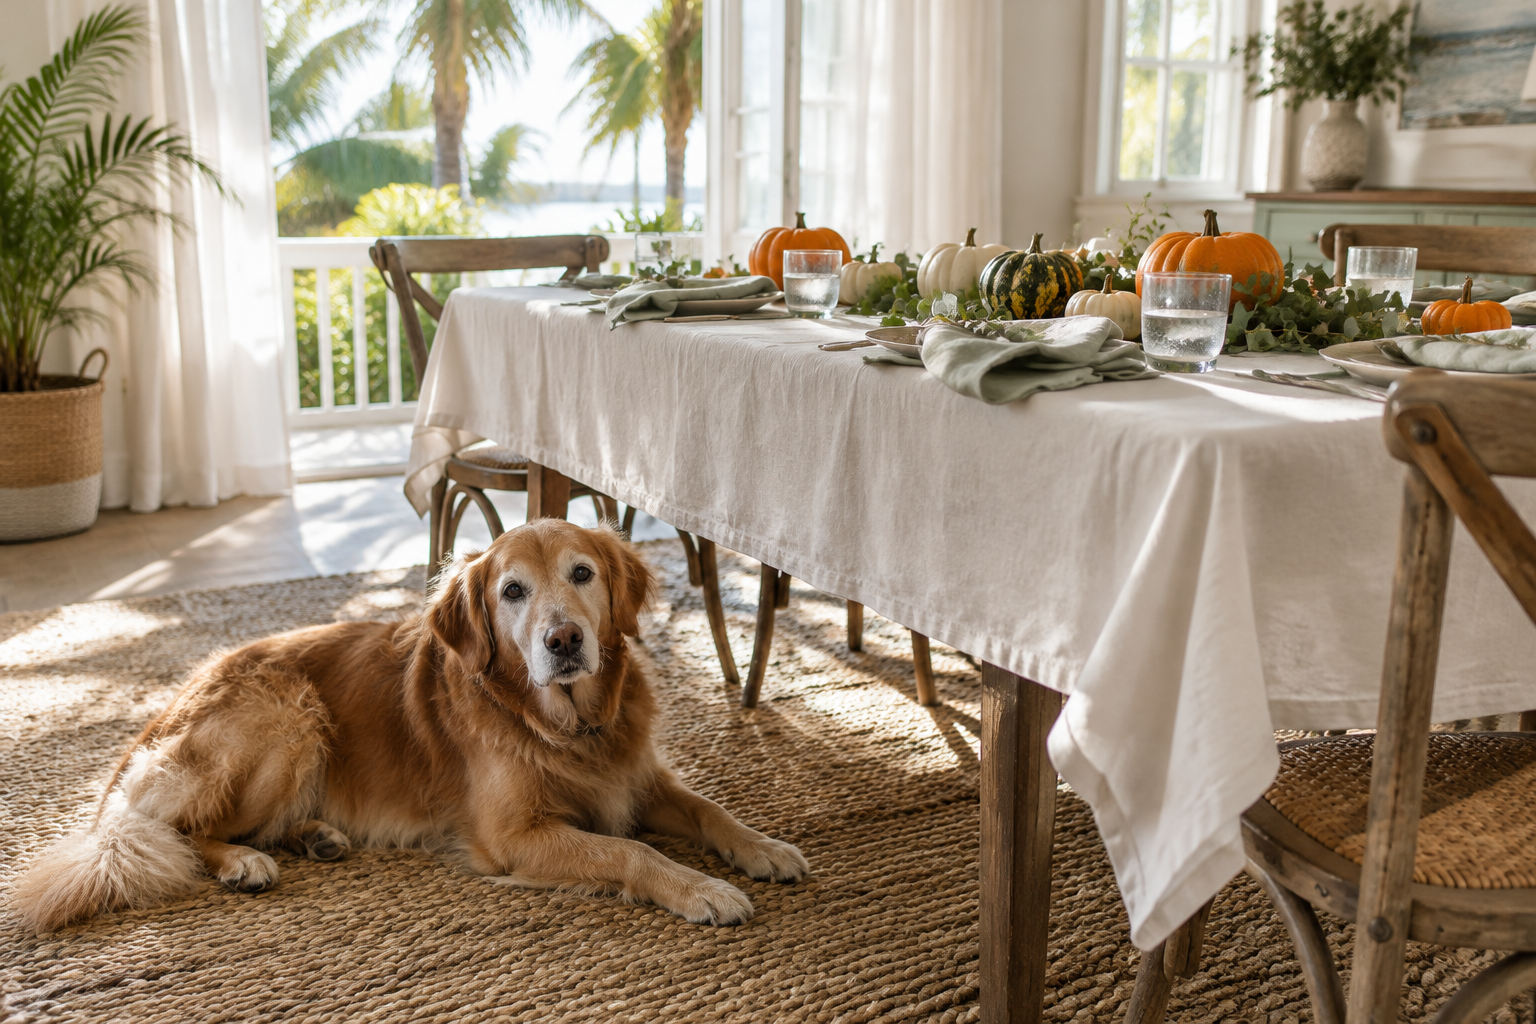
    Set up a quiet retreat. A crate or a spare bedroom with their bed, water and a favorite toy gives your dog somewhere to unwind when the house gets loud. A white noise machine can help soften the commotion.

    Burn off energy early. A long walk or play session in the morning helps your dog settle in before guests arrive. In Florida, the cooler morning hours are the best time for it.

    Watch the front door. Arrivals and departures are prime time for escapes. A baby gate or a leash during greetings helps, and it’s a good week to make sure ID tags and microchip contact details are up to date.

    Keep an eye on the patio. Warm-weather Thanksgivings often spill outdoors. Give your dog shade and fresh water, and keep them away from hot grills, fryers and the dessert table.

    Traveling or Hosting Other Dogs

    Pack a dog bag. If you’re heading to someone else’s home, bring their regular food, bowls, leash, bed, waste bags and any medications so their routine stays as normal as possible.

    Introduce dogs slowly. If guests are bringing their own pups, let the dogs meet outside on neutral ground, supervise playtime and feed them in separate spaces.

    Give Thanks Together

    A dog-friendly Thanksgiving doesn’t take much: a safe plate, a quiet corner and a few extra minutes of attention. Your dog gets to enjoy the day, and you get to relax and enjoy your guests. Hosting this year? See my Thanksgiving Hosting Checklist, Coastal Thanksgiving Table Ideas and Friendsgiving Ideas for more ways to make the day easy. Happy Thanksgiving from our home to yours.
  • How to Set Up a Christmas Village Display: A Step-by-Step Guide

    How to Set Up a Christmas Village Display: A Step-by-Step Guide

    There is something about a lit Christmas village on a dark evening that makes the whole room feel slower and cozier. Whether you have three little buildings or thirty, a thoughtful setup turns a row of pieces into a scene people stop to look at. Here is the step-by-step process I use, from choosing a spot to hiding every last cord.

    Step 1: Choose Your Spot

    Before you unpack a single house, decide where the village will live. Popular spots include a sofa table, mantel, bookshelf, deep window sill, or a dedicated table in a corner. Look for a surface that is sturdy, level and close to an outlet, and away from busy walkways, curious pets and direct heat sources.

    Measure the space and note how deep it is. Depth matters more than width, because depth is what lets you create layers.

    Step 2: Build Height and Layers

    Flat villages look like a parking lot. Height is what makes a display feel like a real hillside town.

    Use risers. Tiered display risers, sturdy boxes or stacked books placed under the base cloth create hills and levels instantly.

    Put tall pieces in back. Churches, clock towers and taller shops go at the back so smaller cottages stay visible in front.

    Leave room for a main street. A clear path through the middle gives the eye somewhere to travel.

    Step 3: Cover the Base

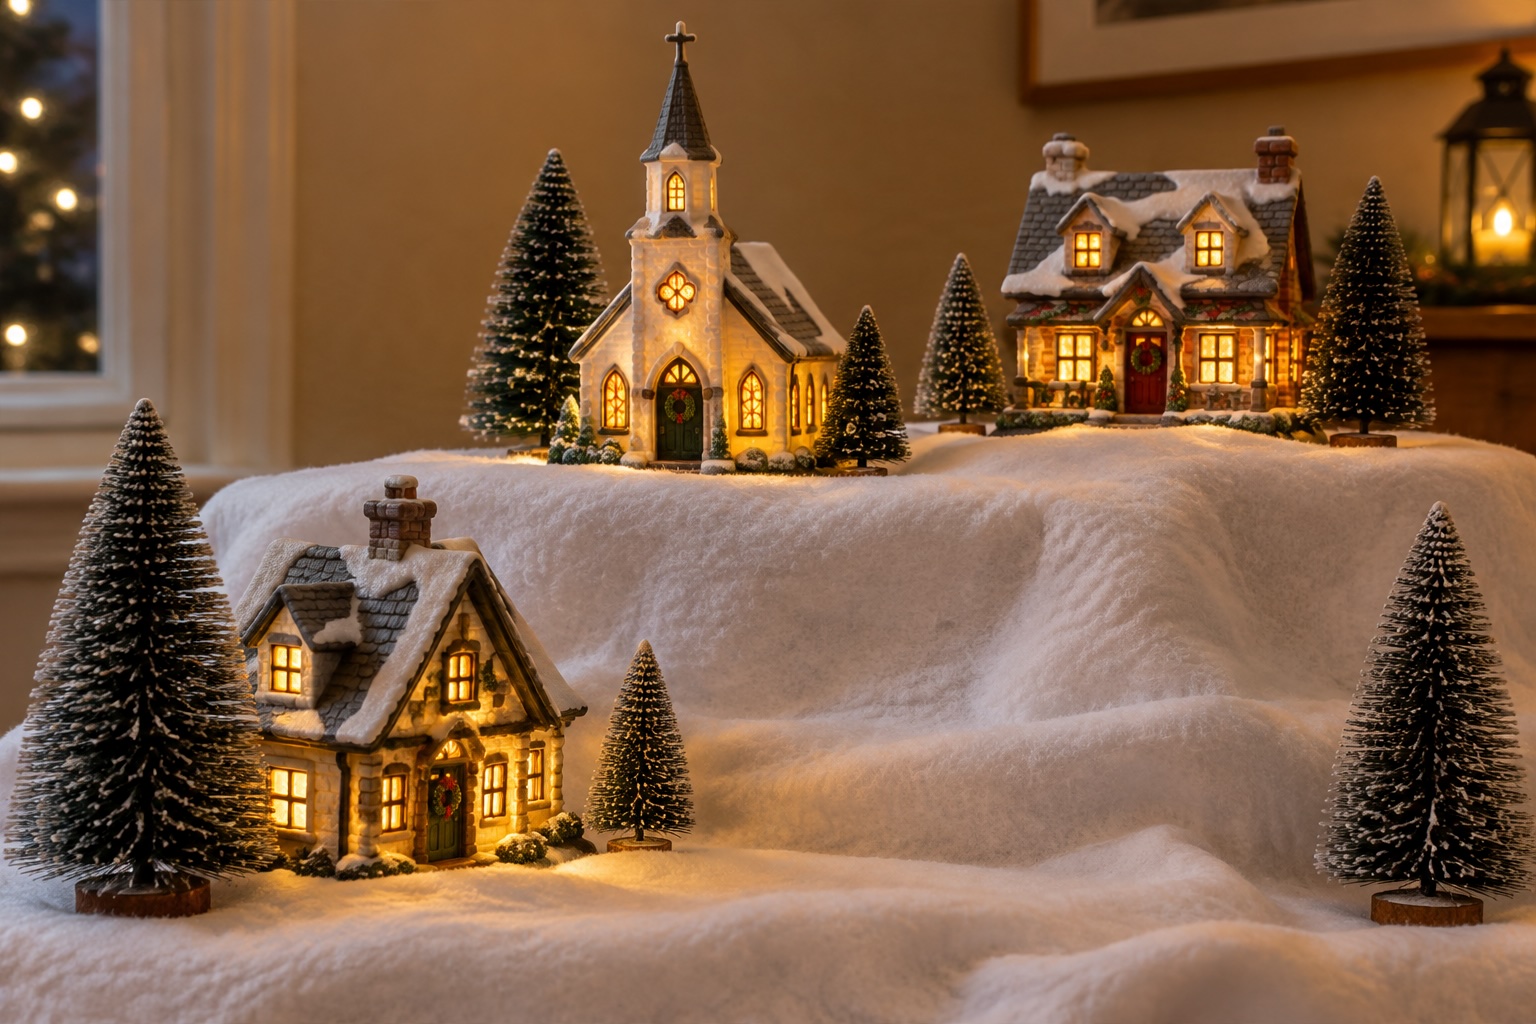
    Snow blanket draped over tiered risers with a lit church and village houses

    Drape a snow blanket or plain white felt over your risers, letting it fold naturally into hills and valleys. A few puffs of loose faux snow along the edges soften hard lines. If you have pets or small children, skip the glitter-style snow and stick to a blanket that will not get scattered around the house.

    Step 4: Place the Buildings

    Start with your anchor piece, usually the largest or most special building, and place it slightly off center. Then add the rest in small clusters rather than a straight line. Angle a few buildings toward each other so they look like neighbors, and turn every piece so its best side faces the room.

    Step 5: Plan Your Lighting and Hide the Cords

    This is the step that makes or breaks a village. Run cords before you add the small details.

    Use a multi-outlet power strip or light adapter. Many villages use a single power adapter with several plug-in bulbs, which keeps cords to a minimum. Follow the manufacturer’s instructions for how many lights each adapter can handle.

    Drop cords behind the risers. Small holes or slits in the snow blanket let you feed cords down and out of sight.

    Try battery-operated village lights. For buildings far from the outlet, battery lights avoid long cord runs altogether.

    Use a timer. An outlet timer turns the village on at dusk without anyone having to remember.

    Step 6: Add the Details

    Now the fun part. Tuck in bottle brush trees of different heights, a few figurines, lamp posts, a little fence or a winding road. Group figures into tiny stories, like carolers outside a church or kids sledding down a hill. Step back often and look from where people will actually stand.

    Make It Yours

    There is no wrong way to build a village. Add a piece each year, mix styles if you love them, and let the display grow with your family. Take a photo once it is finished, too, so setting it up next year is even faster.
    Need inspiration for your theme? See my Christmas village display ideas.

  • Friendsgiving Ideas: 10 Easy Ways to Host a Relaxed Potluck

    Friendsgiving Ideas: 10 Easy Ways to Host a Relaxed Potluck

    Friendsgiving has become one of the most relaxed and fun ways to celebrate the season. It’s all about good food, good company and gratitude, without the pressure of a formal holiday dinner.

    A potluck makes it even easier, because everyone pitches in. These Friendsgiving ideas will help you plan, set the table and host a gathering that feels warm and easygoing from start to finish.

    Plan the Potluck

    1. Pick a date that works for everyone. Many friends spend Thanksgiving Day with family, so the weekend before or after is often easier. Send invitations a few weeks ahead so people can save the date.

    2. Use a simple sign-up system. A shared online list or group text with categories like appetizers, sides, desserts and drinks prevents ending up with five pies and no vegetables.

    3. Handle the main dish yourself. As the host, take care of the centerpiece dish, whether that’s a turkey, a turkey breast or a big pan of something everyone loves. Guests can fill in the rest.

    4. Ask about dietary needs. A quick question in the invitation about allergies or preferences helps everyone plan dishes that more guests can enjoy.

    Set Up the Table

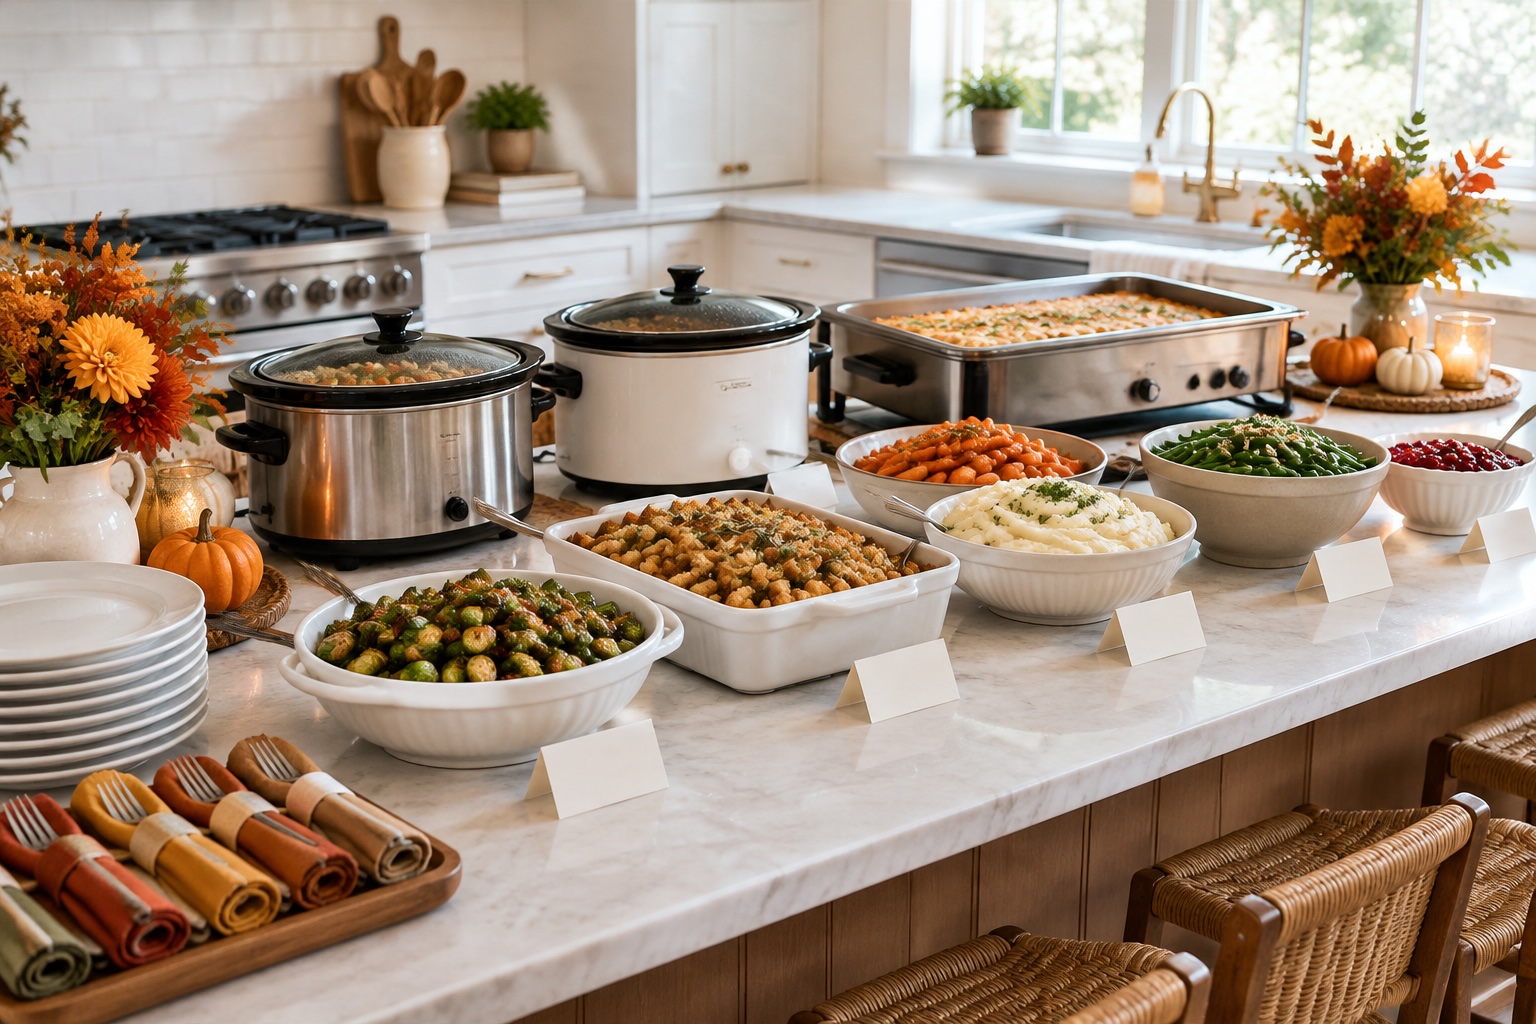
    Kitchen island set up as a Friendsgiving potluck buffet with slow cookers and food labels

    5. Serve buffet-style. A kitchen island or a folding table works perfectly as a buffet. Put plates at the start, then mains, sides, and finally napkins and utensils at the end.

    6. Keep the decor simple. A table runner, a few pillar candles and small pumpkins or seasonal greenery are all you need. A gratitude jar with slips of paper adds a meaningful touch.

    7. Label every dish. Small food label cards or a chalkboard sign with each dish’s name and the person who brought it help guests with allergies and give everyone a chance to say thanks.

    Hosting Without the Stress

    8. Plan for keeping food warm. Slow cookers and a set of chafing dishes or a warming tray keep sides at serving temperature without crowding the oven.

    9. Have leftover containers ready. A stack of disposable or reusable to-go food containers makes it easy to send everyone home with a plate and keeps your fridge from overflowing.

    10. Start a little tradition. Go around the table to share one thing you’re grateful for, or snap a group photo each year. Small rituals are what make Friendsgiving feel special.

    It’s About the People

    The best Friendsgiving isn’t the one with the fanciest food. It’s the one where everyone feels welcome and relaxed. Keep the planning simple, share the work and leave plenty of time to linger around the table.

  • Coastal Thanksgiving Table Ideas for a Relaxed Florida Holiday

    Coastal Thanksgiving Table Ideas for a Relaxed Florida Holiday

    Thanksgiving in Florida rarely looks like the cozy, snow-dusted tables you see in magazines, and that is part of the charm. With mild evenings and plenty of natural light, a coastal Thanksgiving table can feel relaxed, fresh and welcoming. Here are simple ways to set a holiday table that suits a beach-inspired home without losing the warmth of the season.

    Start With a Soft Coastal Palette

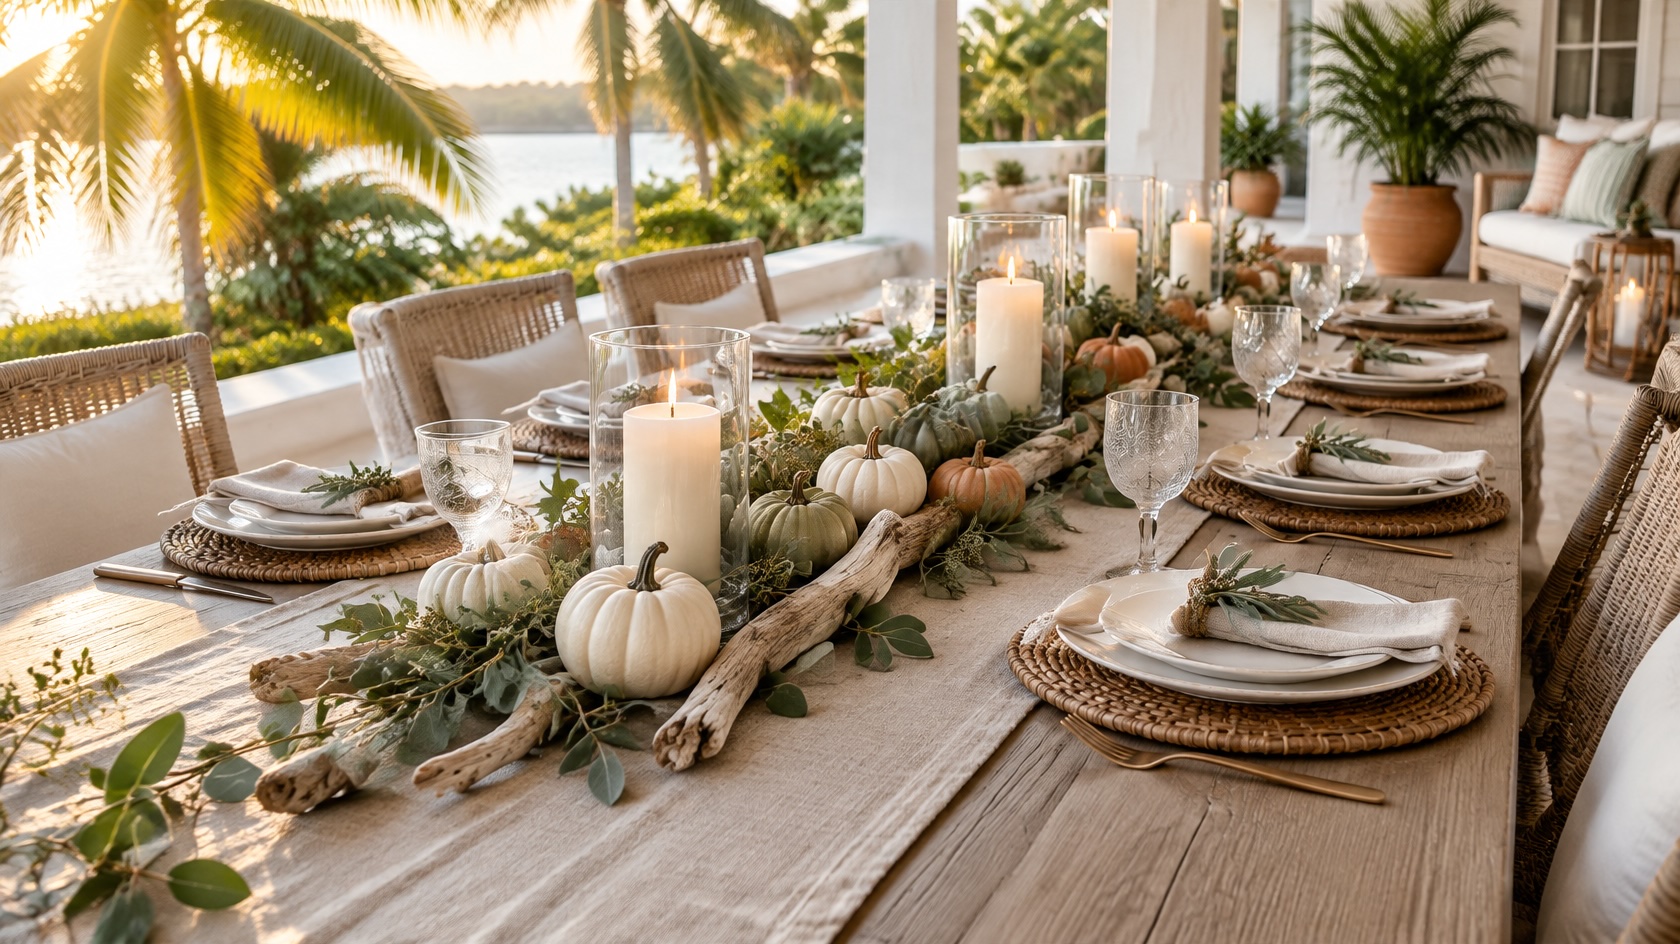
    Instead of deep reds and heavy browns, try a palette of white, sand, sage and soft terracotta. These colors nod to autumn while still feeling light and airy. A few touches of warm gold or brass, like candlesticks or flatware, keep the table from feeling too summery.

    Easy Centerpiece Ideas

    Keep centerpieces low so guests can see and talk to each other across the table.

    Driftwood and candles: Lay a long piece of driftwood down the center of the table and tuck small votives and greenery around it for an easy, natural look.

    Citrus and greenery: Oranges, kumquats or lemons mixed with eucalyptus or magnolia leaves feel festive and very Florida.

    Hurricane vases with sand: Fill glass hurricanes with a layer of sand and a pillar candle. The glass protects the flame if you dine near an open door or on a patio.

    White and sage pumpkins: Mini pumpkins in muted shades bring in the season without overpowering a coastal room.

    Layer Linens and Natural Textures

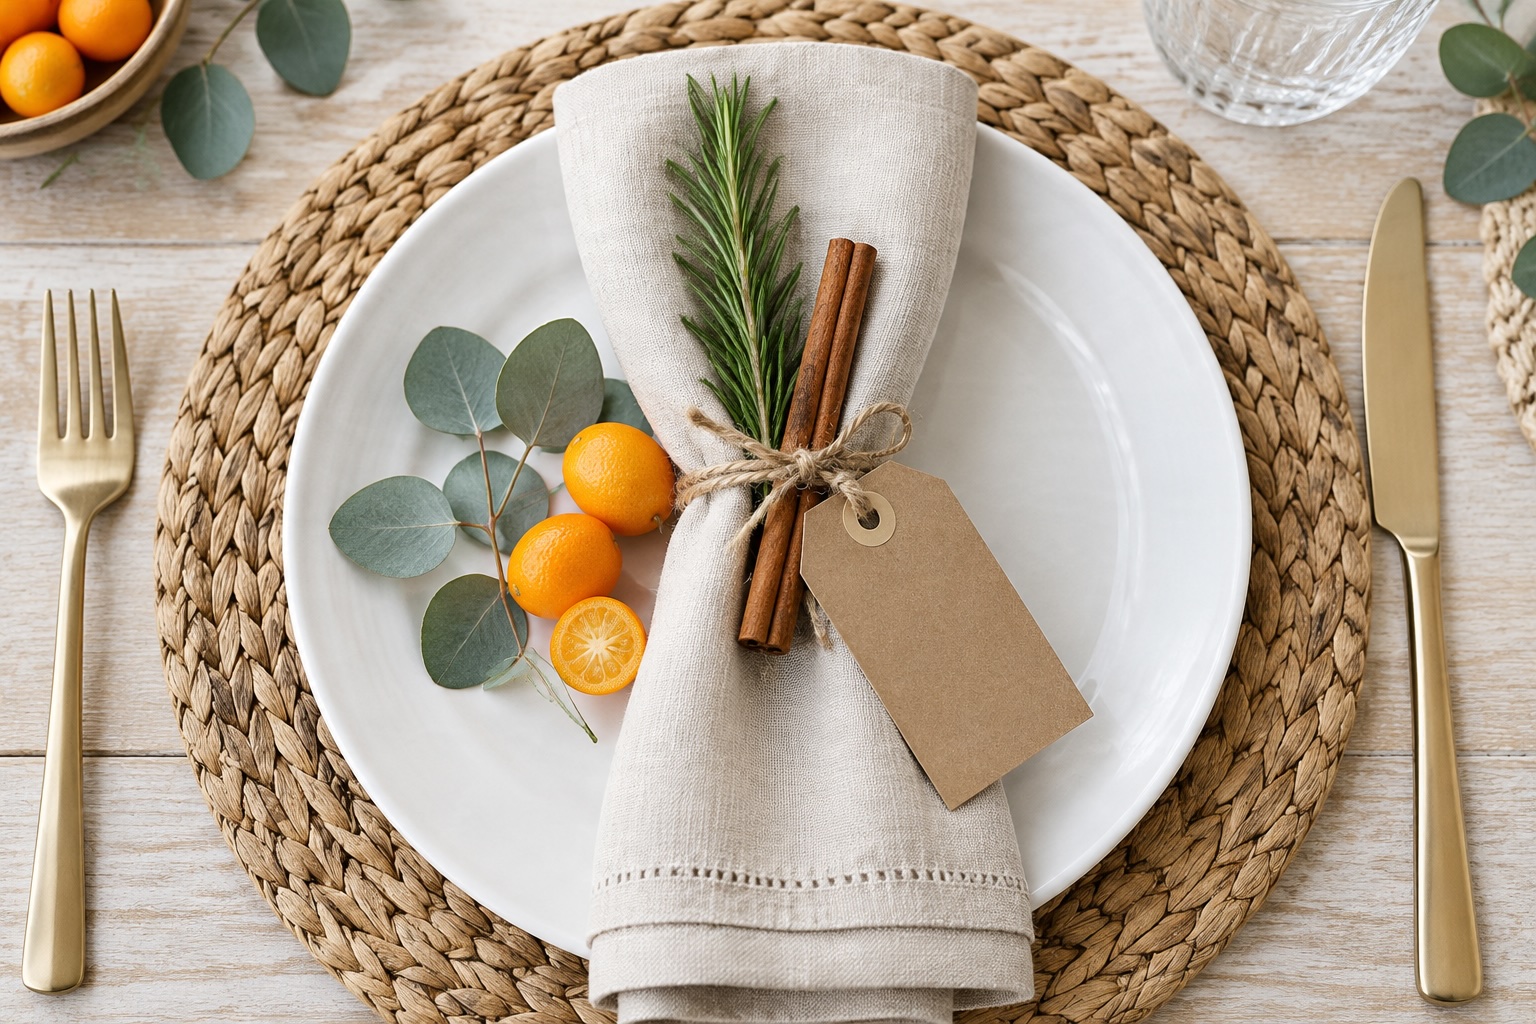
    Coastal Thanksgiving place setting with seagrass charger, linen napkin and rosemary

    Linen runner: A wrinkled linen runner in oatmeal or white looks intentionally relaxed and hides the occasional spill better than crisp cotton.

    Woven chargers: Rattan, seagrass or jute chargers add texture and instantly make simple white plates look special.

    Mixed vintage plates: If you do not have a full matching set, mix in thrifted plates in blues and creams for a collected, casual feel.

    Taking the Table Outdoors

    One of the best parts of a Florida Thanksgiving is the chance to eat outside. A lanai, porch or backyard table can be just as inviting as the dining room with a little planning.

    Plan for the breeze: Use glass-protected or battery-powered candles, and weigh down napkins with a sprig of rosemary tied around each one.

    Keep bugs away: A pedestal or ceiling fan keeps air moving, which helps discourage mosquitoes around the table.

    Add soft lighting: String lights or lanterns keep the mood warm once the sun goes down.

    Small Touches Guests Remember

    Natural place cards: Write names on small kraft tags and tie them to a cinnamon stick, a sprig of greenery or a shell from your own collection.

    Gratitude cards: Set a blank card and pen at each seat and invite everyone to share one thing they are thankful for during dessert.

    Keep It Simple and Enjoy the Day

    A beautiful coastal Thanksgiving table does not need to be complicated or expensive. Start with a light palette, add a few natural textures and leave room for good food and conversation. The most memorable tables are the ones where everyone feels relaxed enough to linger.

  • Thanksgiving Porch Decor Ideas: 10 Easy Fall Looks for Warm-Weather Homes

    Thanksgiving Porch Decor Ideas: 10 Easy Fall Looks for Warm-Weather Homes

    Fall decorating looks a little different when November still feels like summer. If you live somewhere warm, you can absolutely have a welcoming Thanksgiving porch; it just helps to choose decor that handles sunshine, humidity and the occasional afternoon storm. These ten ideas mix classic harvest touches with a relaxed, coastal feel so your front door says “come on in” all season long.

    Start With a Warm Foundation

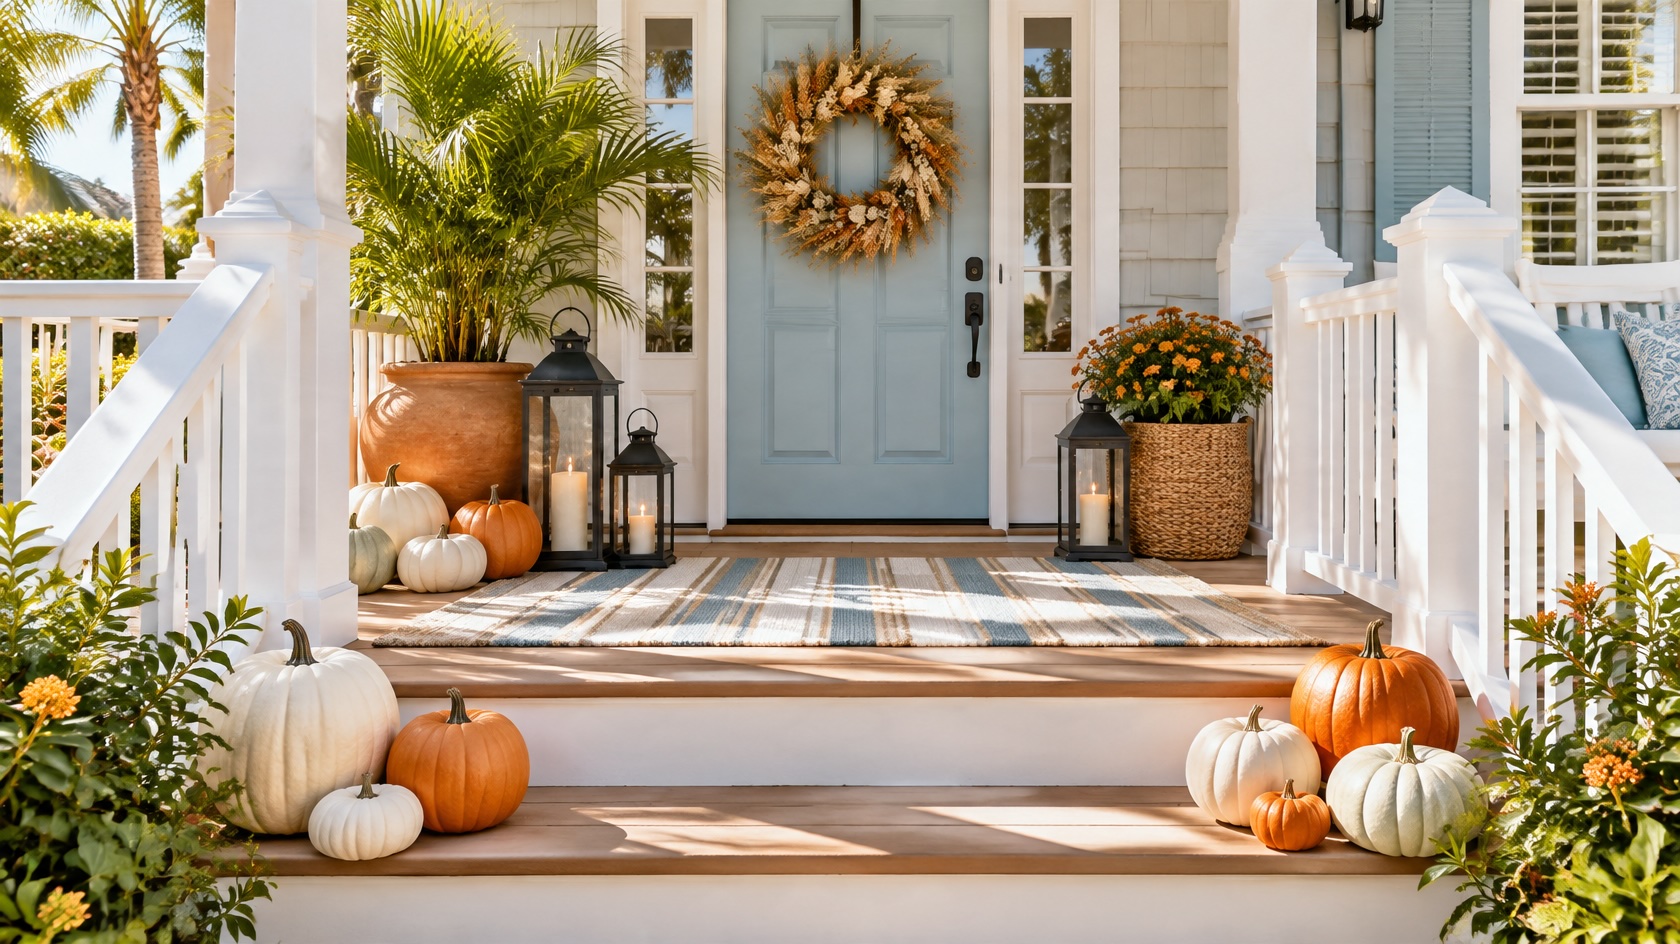
    Layer an outdoor rug. An outdoor-rated rug in rust, mustard or soft neutral stripes instantly sets a fall mood. Layer a coir doormat on top for texture and a classic look.

    Swap in fall pillows. If you have a bench or rocking chairs, add a few outdoor throw pillows in pumpkin, cream or terracotta. Outdoor fabric stands up better to sun and moisture than indoor covers.

    Hang a seasonal wreath. A wreath made of dried grasses, wheat, eucalyptus or faux fall leaves works well in warm climates. Choose one labeled for outdoor use if your door gets direct sun or rain.

    Choose Decor That Handles the Heat

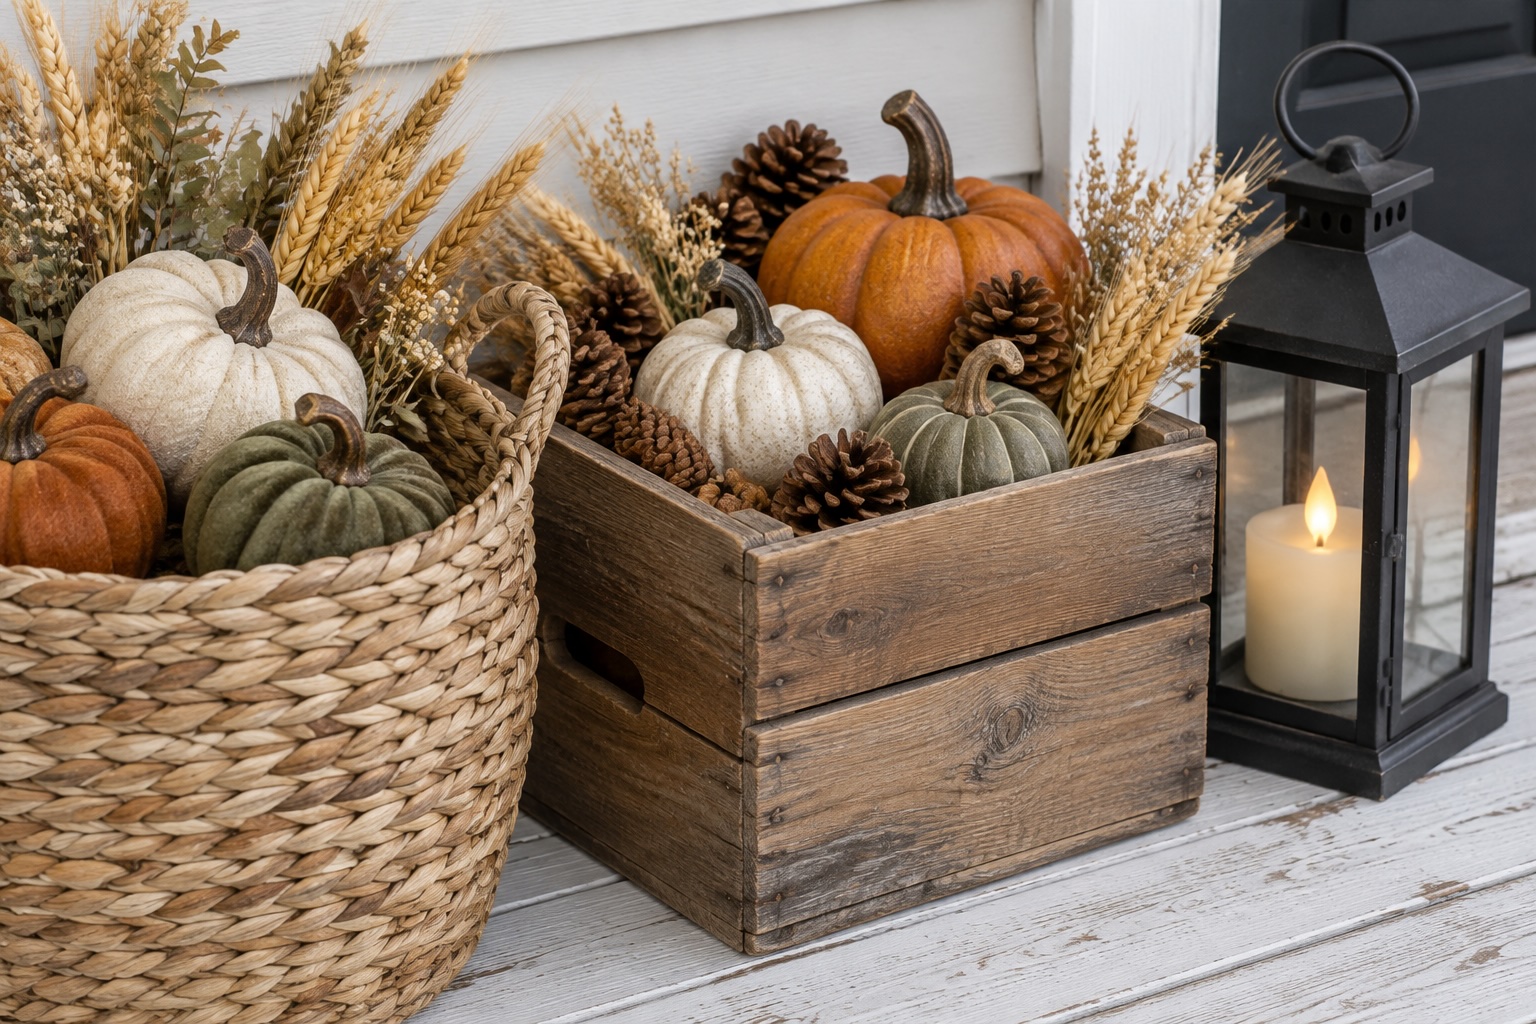
    Seagrass basket and wooden crate filled with faux pumpkins and pinecones next to a lantern

    Real pumpkins and fresh florals can soften or fade quickly in hot, humid weather. Mixing in a few longer-lasting pieces keeps your porch looking fresh through Thanksgiving.

    Mix real and faux pumpkins. Use faux pumpkins in white, sage and soft orange as your base, then add a few real ones closer to the holiday. Keeping real pumpkins out of direct sun can help them last longer.

    Pick heat-tolerant plants. Ask your local garden center which seasonal plants do well in your area this time of year. Group a few pots in different heights for a full, layered look.

    Use natural textures. A seagrass basket, a wooden crate or a galvanized bucket filled with pumpkins, pinecones or dried stems adds harvest charm without fragile pieces.

    Add Glow and Personality

    Group lanterns by the door. Two or three lanterns in different sizes with flameless candles add a warm glow in the evening. Battery-operated candles with timers are an easy, low-maintenance choice.

    String warm lights. Outdoor-rated LED string lights along a railing or porch ceiling make the space inviting for guests arriving after dark.

    Add a welcome sign. A simple wooden sign that says “Give Thanks” or “Welcome” leaned against the wall ties the look together and can stay up from early November through the holiday.

    Bring in a coastal touch. White pumpkins, driftwood, rope accents or a soft blue planter give a classic fall porch a breezy, beachy twist that suits warm-weather homes.

    A Porch Ready for Gathering

    You do not need crisp air to create a cozy Thanksgiving welcome. Start with one or two ideas, like a new rug and a cluster of pumpkins, then add lanterns or a wreath as the holiday gets closer. Your guests will feel the warmth the moment they reach the door.

  • Thanksgiving Hosting Checklist: What to Do the Week Before and the Day Of

    Thanksgiving Hosting Checklist: What to Do the Week Before and the Day Of

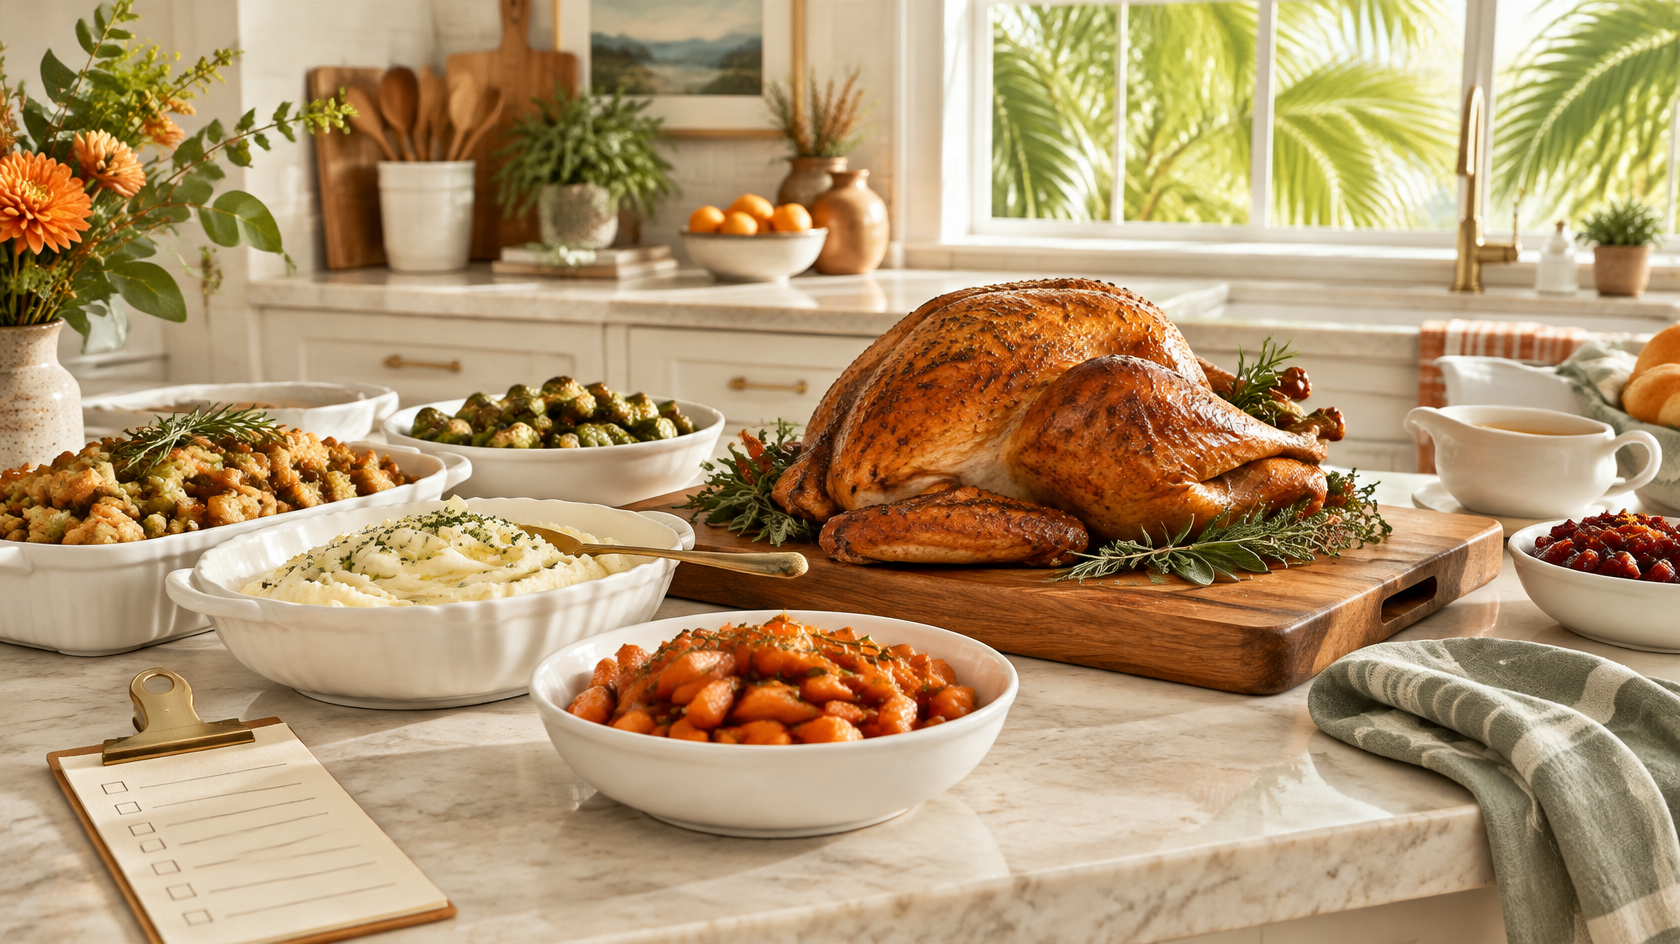
    Hosting Thanksgiving is a lot like running a small event: the big day goes smoothly when the little jobs are spread out ahead of time. This Thanksgiving hosting checklist breaks everything into simple steps, from the week before to the moment guests walk in, so you can enjoy the day instead of racing the clock. Print it, stick it on the fridge, and check things off as you go.

    One Week Before Thanksgiving

    Confirm your guest count. Check in with everyone, note any dietary needs, and decide who is bringing what. A shared list or group text keeps potluck dishes from doubling up.

    Finalize the menu and shopping list. Write down every dish, then list every ingredient by store section. Split shopping into nonperishables now and fresh items later in the week.

    Plan your turkey timeline. If you are buying a frozen turkey, check the thawing guidance on the package or from a trusted food safety source and count backward so it is ready in time.

    Take inventory of serving pieces. Pull out platters, serving spoons, a roasting pan and extra chairs. Label each serving dish with a sticky note for the food it will hold so helpers know where everything goes.

    Two to Three Days Before

    Clean the main spaces. Focus on the kitchen, the guest bathroom and the areas where people will gather. Clear out the fridge to make room for leftovers and make-ahead dishes.

    Shop for fresh ingredients. Pick up produce, dairy and bread, plus ice, drinks and extra storage containers so guests can take leftovers home.

    Make what you can ahead. Cranberry sauce, pie crusts, chopped vegetables and many casseroles can be prepped in advance and stored in the fridge until the big day.

    The Day Before

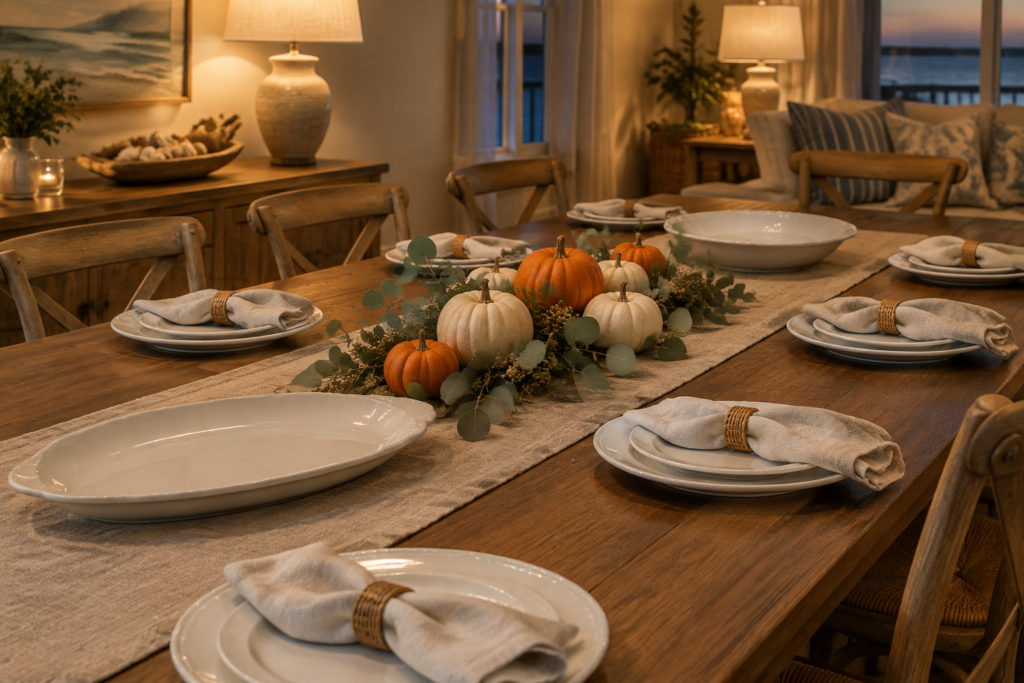
    Thanksgiving table set the night before with pumpkins and eucalyptus

    Set the table. Lay out the tablecloth or runner, plates, napkins and centerpiece tonight. It is one less thing to think about tomorrow, and it builds the excitement.

    Bake pies and desserts. Most pies hold up well when made a day early, which frees your oven for the main event.

    Write an oven schedule. List each dish with its temperature and cook time, then map out what goes in when. Tape it inside a cabinet door so anyone can follow along.

    Thanksgiving Day

    Start the turkey first. Follow your timeline, use a meat thermometer to check doneness, and let it rest before carving while sides finish in the oven.

    Set up a drinks station. A self-serve spot with cups, ice and a few drink options keeps guests out of the kitchen while you cook.

    Run the dishwasher early. Start with an empty dishwasher and a sink of soapy water so cleanup does not pile up after dinner.

    Remember Why You Are Hosting

    No Thanksgiving goes exactly to plan, and that is okay. The rolls might be a little too brown or the gravy might need another whisk, but what your guests will remember is the warm welcome and the time around the table. Accept help when it is offered, keep this checklist close, and save a plate for yourself.

  • Holiday Front Porches That Wow — Without the Snow

    Holiday Front Porches That Wow — Without the Snow

    By Caroline | BlogsbyCaroline.com

    Who says you need snow to create magic?

    In sunny places like Florida, California, or the Gulf Coast, we celebrate the holidays with palm trees, porches, and a twist of tropical cheer. Whether you’re sipping coquito on a swing or lighting up the ficus instead of a fir, your front porch deserves to sparkle — no frost required.

    Ready to deck the halls — coastal style? Let’s turn your entryway into a festive, Florida-approved holiday statement!

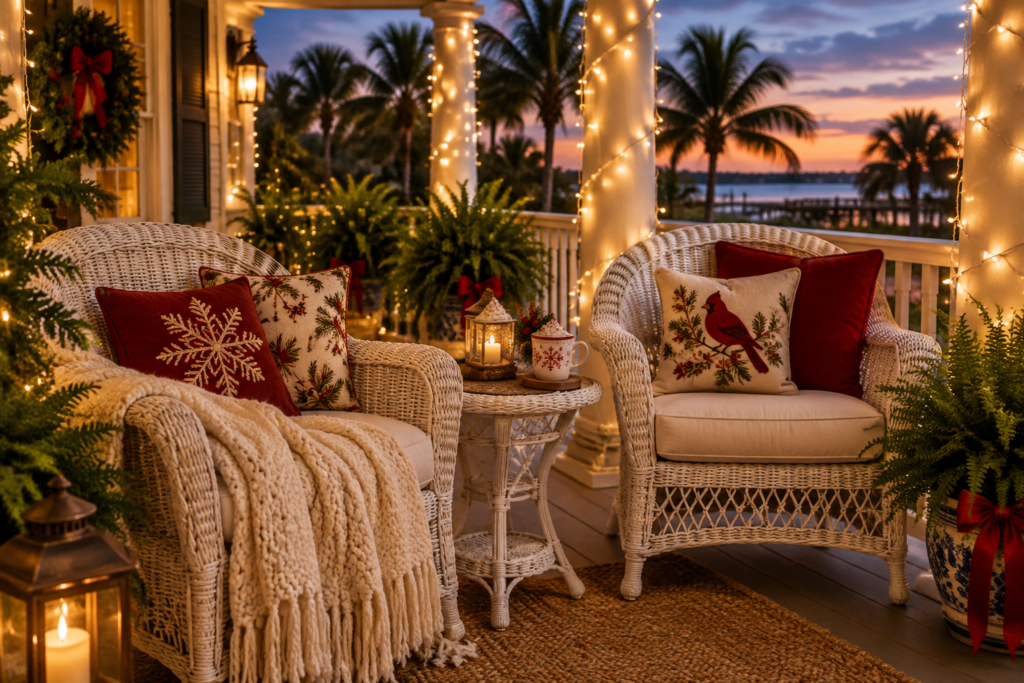
    Coastal porch seating with holiday pillows and string lights at dusk.

    1. Swap Pine for Palm

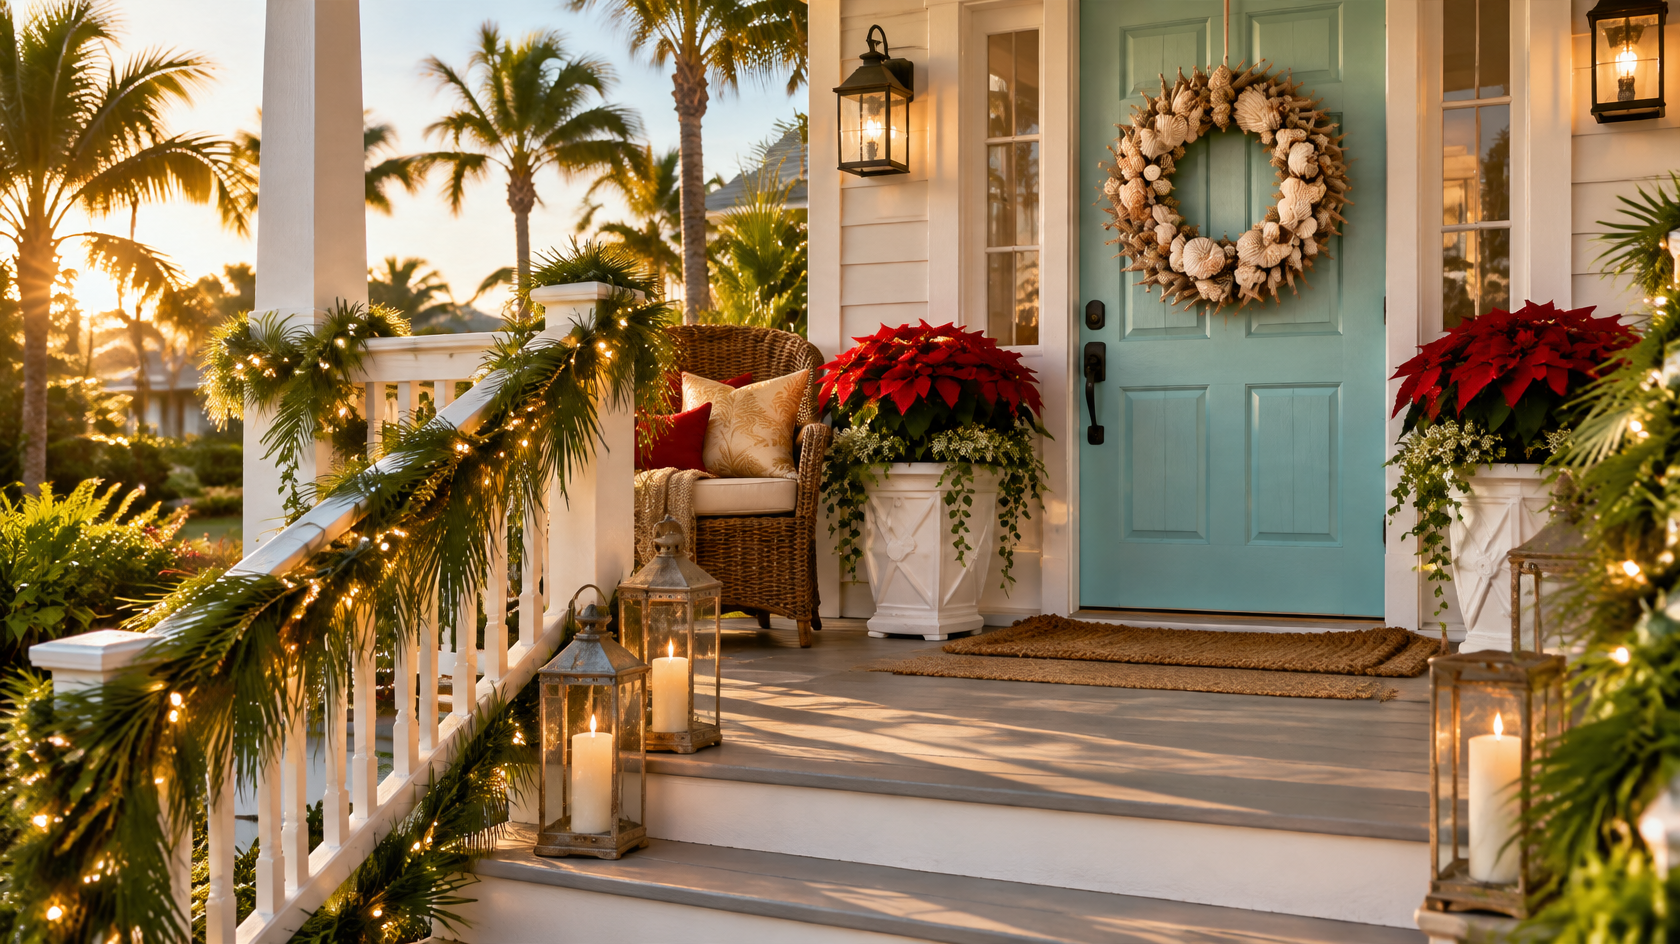
    Trade traditional garlands for palm fronds wrapped in twinkle lights. Add a few red bows, gold ornaments, or even tropical flowers like poinsettias or hibiscus for a warm-weather twist.

    Tip: tuck the battery boxes somewhere covered so they stay dry.

    2. Light the Way with Lanterns

    Line your porch steps or walkway with oversized lanterns filled with:
    – Battery-operated candles
    – Mini ornaments
    – Sand + shells with fairy lights

    Think “coastal holiday glow” instead of snowy sparkle.

    3. Coastal-Themed Wreaths

    Swap out evergreen for wreaths made from driftwood, sea shells, or grapevine. Accent with coral-toned ribbon, aqua berries, or starfish-shaped ornaments.

    Bonus: Hang one on each window for a charming coastal cottage vibe.

    4. A Front Door That Pops

    Painted front doors shine during the holidays! Make yours pop with:
    – Metallic door decals (“Merry + Bright” in script)
    – A bold bow
    – Hanging bell clusters in gold or bronze

    Pair with potted poinsettias or ferns in white planters for a tropical take on tradition.

    5. Outdoor Tree (Florida Edition)

    No pine? No problem. Use a potted palm, ficus, or faux tree to create an outdoor holiday tree. Decorate with:
    – Shatterproof ornaments
    – Waterproof ribbons
    – Mini LED lights

    Wrap the base in burlap or a tree skirt for polish.

    6. Cozy Seating with Holiday Pillows

    Create an inviting space with:
    – Wicker or teak chairs
    – Holiday-themed pillows (think flamingos in Santa hats, sea turtles with garland)
    – Soft throws in red, gold, or cream tones

    This is the perfect setup for morning coffee or evening cocoa (iced, of course).

    7. Sound of the Season

    Hang sleigh bells or wind chimes with seasonal flair near your door. Bonus points for coastal-themed tones or bells made with capiz shells or brass.

    8. Porch Treat Station

    Hosting friends or delivery drivers? Set out a little holiday hospitality:
    – A small table with wrapped candies or cookies
    – Mini thermos with warm cider or tea
    – Sign: “Thanks for spreading cheer!”

    Final Touch: Don’t Forget the Glow

    Florida evenings are perfect for porch ambiance. Add:
    – Curtain string lights on columns
    – Net lights on bushes or railings
    – Light-up signs (“Joy,” “Believe,” “Let it Glow”)

    Let your porch twinkle like the Everglades sky!

  • Christmas Village Display Ideas: 10 Creative Places to Show Off Your Village

    Christmas Village Display Ideas: 10 Creative Places to Show Off Your Village

    There is something about unpacking a Christmas village that makes the season feel official. The tiny lit windows, the little figures on their way somewhere, the snowy rooftops (even here in Florida): it is pure nostalgia. But once your collection grows past a few pieces, the big question becomes where to put it.
    Ready to build yours? Follow my step-by-step guide to setting up a Christmas village.

    Whether you have three houses or thirty, here are ten display spots that work in real homes, including small ones, plus a few tips for making any location look intentional.

    Before You Choose a Spot

    Think about three things first: a nearby outlet (or plan on battery-operated village lights), a sturdy, level surface, and how much reach curious kids and pets have. A spot you walk past every day is ideal, because a village is meant to be enjoyed up close.

    10 Places to Display Your Christmas Village

    The mantel. A classic for a reason. Run a snow blanket along the shelf, set taller buildings toward the back and let a garland frame the scene. Keep pieces a safe distance from a working fireplace.

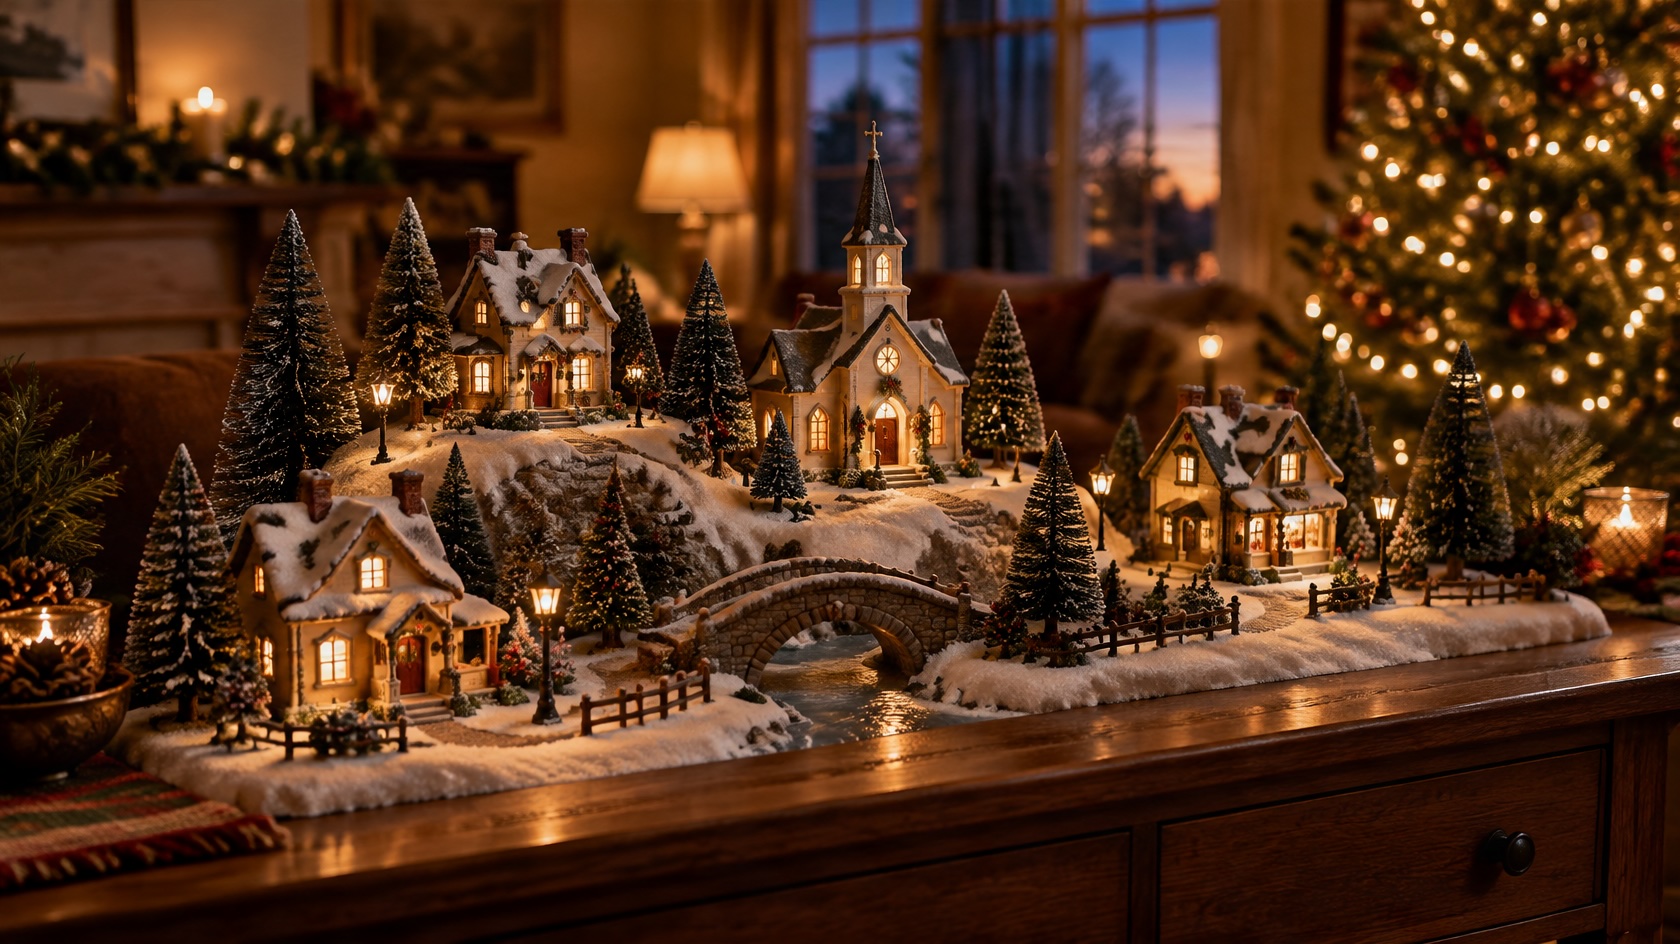
    A console or sofa table. Long, narrow tables are perfect for a linear main street. Add a row of bottle-brush trees behind the buildings to create depth.

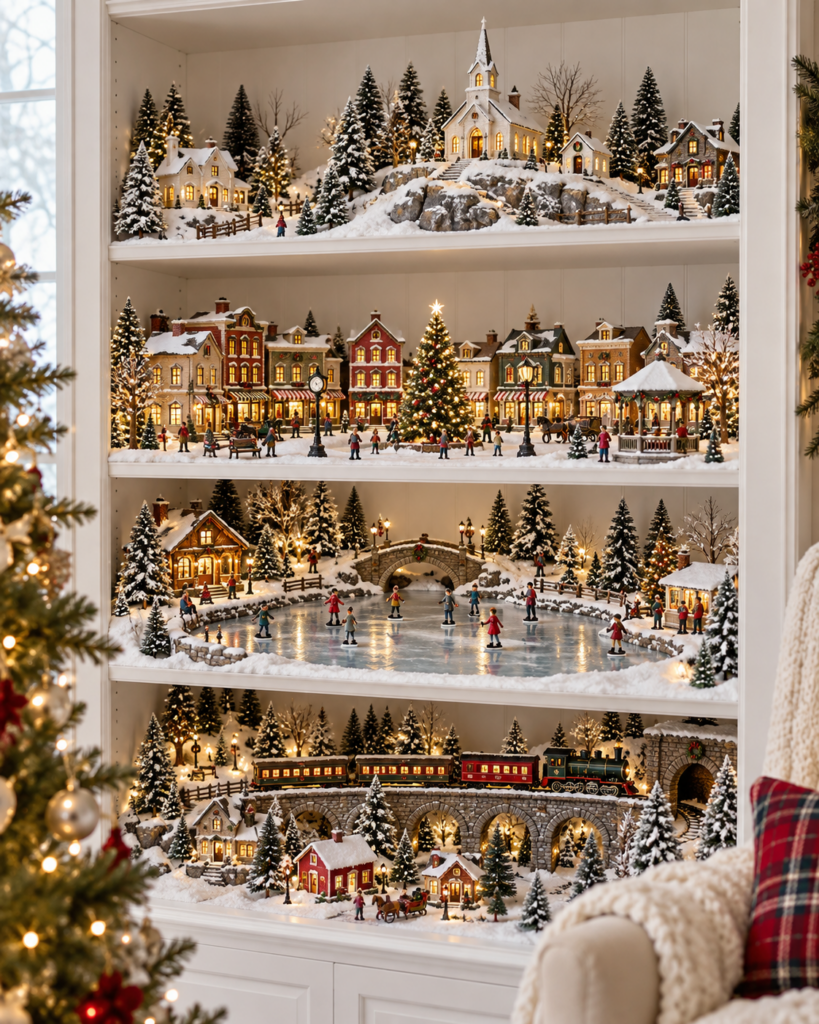
    Bookshelves. Turn each shelf into its own little neighborhood: the town square on one level, a skating pond on another. Push books to the sides or remove them for the season.

    Under the tree. A village tucked around the tree skirt feels magical, especially paired with a train loop. Leave a clear path for watering and gifts.

    A curio cabinet or shadow box. Glass-front cabinets protect delicate pieces from dust, paws and little hands. Mini villages shine here.

    Wall-mounted shelves or frames. Floating shelves or a deep frame turned into a shelf free up floor and table space, a smart choice for apartments.

    Tiered display risers. Stepped risers or an A-frame stand add instant height, so every building gets seen. Drape them in a snow blanket to hide the edges.

    A window sill. A wide sill lets passersby enjoy your village at night. Avoid strong direct afternoon sun, which can fade painted pieces over time.

    A kitchen counter corner or open hutch. If you are always in the kitchen, a small cluster near the coffee station brings daily joy.

    A dedicated village platform. For serious collectors, a simple tabletop built from plywood or foam board, set on a folding table, gives you room for hills, rivers and roads.

    Finishing Touches That Pull It Together

    Whatever spot you choose, a few details make a village look finished: a base layer of faux snow or a snow blanket, miniature trees in two or three heights, and a plan for cords. A slim power strip hidden behind a building, cord clips and small batting mounds go a long way toward keeping the wires out of sight.

    Make It Yours

    There is no wrong way to display a Christmas village. Start with one spot, enjoy it all season, and let your collection (and your ideas) grow from year to year. Which spot are you trying first?